https://docs.google.com/presentation/d/10EwGGzgBzp2DVNCpmBwaSRw3WvWyHrwrEfxTQ2DUamw/edit#slide=id.p14
https://docs.google.com/presentation/d/1VubAToJGX_lXEQayPbQr9A4J7_519lVmj3z0PxXmIsE/edit#slide=id.p13
https://drive.google.com/file/d/0BwiUeTRt51ykdzF0V3RVSUhYbzQ/edit?usp=sharing
Thursday, 19 June 2014
Friday, 13 June 2014
The Future of Media Technologies
Assignment 4 - Task 4
Media Technology investment plan
We live in an ever expanding technological world, with new pieces or software and hardware being developed every day. The time to stay up to date on the latest equipment is now, with the gap between producer and consumer being broken, we are all 'prosumers'. Meaning that we are now capable to develop our own films, without needing a really expensive camera or budget. However as the college media department is constantly updating it's media technology, they need to stay up to date, so to ensure the students get the best possible quality of work from their software and hardware. I will be writing up a written rationale for the college, suggesting five new pieces of software and hardware which would be a great investment in this new technological era.
Hardware
Blackmagic Pocket Cinema Camera
The first piece of hardware which the college should invest in, is the Blackmagic Pocket Cinema Camera. This new top of the range DSLR camera, it is a pocket sized 16 digital camera which is shaping a new filmmaking generation. The Blackmagic Pocket camera records 1080HD resolution ProRes 422 (HQ), processing it at super speeds to SD cards. Making it easier and a lot quicker to colour correct your media files on your own personal computer. The Blackmagic is perfect for shooting a cinematic look, also being more perfect to film in more tougher and remote locations. The camera is also perfect for independent movies, documentaries, and more. The camera also has a wider dynamic range, this gives the footage a much more beautiful cinematic look. The wide dynamic range is 13 stops, meaning all footage retains sensor data. This camera comes in at a reasonable proposed price of £649, depending on the retailer you could get it cheaper.
In terms of replacements, this cutting edge DSLR camera would replace all the Canon 600Ds in the media department. It by far beats the quality of the Canon and it ha s a much better cinematic improvement in terms of shooting capabilities. It is also a lot more portable and easier to carry around, as opposed to the Canon 600D, although the Canon 600D is a brilliant camera, this Pocket Cinema Camera is also a lot better for transferring across files, as it is done a lot quicker and will convert into the right format.
You can purchase this Pocket Cinema Camera from this retailing website
http://www.jigsaw24.com/blackmagic-design-pocket-cinema-camera/cinema-cameras/-/fcp-product/19416

HERO3+ GoPro Camera
The second piece of hardware I would suggest to the media department that they should invest in, is the HERO3+ Black Edition GoPro Camera. This small extreme sports camera, is perfect for shooting fast paced extreme sports, such as mountain biking, skiing, bungee jumping, running etc. Being much smaller and lighter than its previous models, this new camera brings about highly improved image quality, with powerful new features such as being more convenient and versatile. This new model also has an added video mode called SuperView, this is a video mode which can capture a new cutting edge wide angle perspective. The HERO3+ also comes with a fully functioning Auto Low Light mode, this gives the footage an amazing low light performance, the way this works is that the function adjusts the frame rate. Other positives with the camera are that it has a 30% longer battery life, a 4x faster Wi-Fi, a much sharper lens and it is accessible on all GoPro mounts. The price for this camera is £359.99, this includes VAT and the import for any EU country.
Now this GoPro piece of hardware would replace the bigger cameras and the current GoPro's that are already in use in the college, which the media department have on offer, another camera which this new GoPro would replace would be the Canon XHA1S. This filmmaking camcorder is rather large and heavy. It records onto tapes and to transfer across footage, you have to use a dv tape deck. This is something which can take a long time. The Canon XHA1S is also what people usually use for harsher, more tougher terrain environments. Because it's bulky, it isn't so delicate. So the HERO3+ GoPro would be a perfect replacement as it designed for filming in tough locations and it built so that it can be knocker around a lot, without ascertaining heavy damage.
You can purchase the GoPro HERO3+ camera from this website
http://gopro.com/cameras/hd-hero3-black-edition


The Magic Mouse is the next piece of hardware that I would suggest to the media department to invest in, it is the worlds first Multi-Touch mouse. This is a smart and dynamic new product with in built Multi-Touch technology, this is a ground breaking new way to interact with portable devices. Now this accessory already comes with all the new generation of iMacs, so if the college invested in all the new iMacs then this mouse wouldn't be necessary. However if they don't invest in the new iMacs, this is still a good purchase they should consider, so to improve the desktops they already have.


Software
DaVinci Resolve 11
The first piece of software I would advise the media department in purchasing is DaVinci Resolve 11, this is a professional state of the art Hollywood editor and colour corrector software. This software is really accessible and resolution independent, meaning it can be used on the move on a set, or alternatively in a small studio or a large Hollywood production studio. It is a professional piece of software which is used globally on Hollywood feature films, television programs, music videos and viral advertisements. It is so popular due to its compatibility, speed and high image quality. All these qualities makes it much easier to manage your work flow.
The price for this software package comes in various different forms, the DaVinci Resolve 11 Lite version is completely free to download. This comes with all the different specifications, however you are limited with some of the tools. For example you are only limited to a certain amount of memory, when editing a project. You can also only edit up to 1080p HD, so my suggestion to the college media department would be to purchase the full software package at an okay price of £625. Now tis price allows you to edit 3D, as well as having an unlimited amount of editing space and allowing you to edit over 1080p HD. The DaVinci Resolve 11 editing software will be a good replacement in the college for After Effects. As this well outsmarts the colour grading and editing functions which After Effects can produce.
DaVinci Resolve 11 can be purchased as the full package or downloaded ad the free Lite version from this website
http://www.blackmagicdesign.com/uk/products/davinciresolve/howtobuy
Final Cut Pro X
The next piece of software I would suggest to the media department to invest in would be Final Cut Pro X, the college already has Final Cut Pro 7 installed onto all the Macintosh desktops. Now the higher education department has Final Cut Pro X installed on some of their Macs. However the further education department doesn't. So this new piece of software would be a good replacement for Final Cut Pro 7. This developed piece of software is a much bigger improvement to the prior piece of editing software, it has now been optimised for the newest Mac systems, there are dozens of editing enhancements, it is the cutting edge development for delivering 4K videos. The new Final Cut lets you smoothly edit at full resolution, added with an boosted playback feature. You can also edit multi cam with up to 16 continuous streams of 4K ProRes.
Both graphics cards are used in Final Cut Pro X, they can play back the effects as soon as you add them in. Hence meaning you can apply complex filters and colour grade all in real time. Another new benefit to this vast upgrade is that exporting is now done at a high speed. Final Cut Pro can accelerate the power of both GPUs to enhance the rendering and export in the background. The effect of this, in comparison to the old version which the college has is that you can now deliver files as fast as you edit. It also means you can still edit your clips while they are rendering, you can also export to YouTube in full 4K resolution. The price for Final Cut Pro X is £199, this is a fairly reasonable price, considering the huge difference it is to its successor.
Final Cut Pro X can be bought from this download link here
https://itunes.apple.com/gb/app/final-cut-pro/id424389933?mt=12
Logic Pro X
This enhanced piece of software is a great step up from Soundtrack Pro, its a recording studio designed for professionals which can be used on the Mac. Logic Pro also allows musicians globally to go from the first note, to final master. You can begin with any instrument you want, exploring lots of different loops and samples. This piece of kit comes with what is known as a 64-bit architecture, allowing you to handle projects of any size. This is a huge advancement to Soundtrack Pro, as it has some very beneficial qualities which Soundtrack Pro doesn't. For example it has an advanced set of options that lets you record, edit and manipulate performance.
One other advantage to Logic Pro X, which is why I am suggesting the media department purchase it is because of an editing feature called Flex Time. This function helps you to change the tempo and timing of your performance to achieve the smoothest performance possible. The waveform which contains individual beats can be easily moved, this allows you to change drum, vocal, guitar or any other form of track without slicing it up. Now this piece of software comes in a fair price of £139.99, this is a huge step up from Soundtrack Pro as it allows you so many functions, along with fast reciting and a much bigger library or authentic instrumental and orchestral sounds.
Logic Pro X can be bought at this address
https://ssl.apple.com/uk/logic-pro/
Motion 5
Another amazing piece of software which would be a huge asset to the media department and will replace Motion is Motion 5. This editing program is perfect for easily creating titles, transitions and effects for Final Cut Pro. The fact that this new updated version is also perfect for creating effects for Final Cut Pro is great for the media department as it means the two systems can work together. Making it especially easy and accessible to use for projects.
Motion 5 has a new easy layout interface which has been developed to make editing a lot easier for Final Cut users. This new interface comes complete with an enhanced retina display, redesigned icons and a darker look that will clearly highlight colour perception. A lot of the filters include onscreen controls for the effects, keyframe editing is also a lot more accessible because of a view that shows the keyframe editing tool under the timeline. The benefits of upgrading Motion to Motion 5 is because there is a much larger library effects, titles and transitions. These samples can also be further customised. Motion 5 also comes with the resolution independence function, this is where there is no size limit for still images or clips. Importing and exporting is also unlimited, wherein no matter what the size. You can import or export images without having to scale or crop them. All this comes in at a great price of £34.99.
This is the website address for purchasing Motion 5
https://itunes.apple.com/gb/app/motion/id434290957?mt=12&v0=www-naus-motion-buynow
Final Draft
The final piece of software I would the media department in college to invest is would be Final Draft, this is a leading screenwriting software package which is used by Hollywood industry professionals. It is also used on all the big Blockbuster films, it is the program that filmmakers most commonly use. This piece of software is also the leading number one selling for screenwriting software's. Final Draft would be replacing Celtx on the college Mac's, there are 100s of templates which the program already equips for the user, with a formatting tool which can be used for picking what kind of screenplay you are writing. For example, a film, television show, stage play etc.
Final Draft is a easy piece of software which has clear navigational tools so you know where everything is, there is a new navigator tool with the new version in which you can display script notes and character arcs. Filtered searches are also do able by key words. There is also a floating customizable palette which helps you to sort and sift through all your information, this is something which Celtx cannot offer. One of the great functions of Final Draft which Celtx doesn't have is Script Notes. This tool keeps a library of all your ideas, suggestions, parts of a scene that you cut out but don't want to delete it in case you need it for future use. Final Draft comes in at a price of £147.27
You can buy Final Draft here off of this website
http://store.finaldraft.com/final-draft-9.html
Estimated Quantity and cost for each year
Below I have written in lists the estimated amount of how many pieces of hardware and software the college will need, as well as how much it is going to cost them.
Hardware
Product: Black Magic Pocket Cinema Camera
Quantity: 6
Price: £3,894
Product: HERO3+ GoPro Camera
Quantity: 6
Price: £2,159.94
Product: iMac
Quantity: 25
Price: £35'000
Product: Magic Mouse
Quantity: 25
Price: £1,475
Product: Rode Pin Miniature Omnidirectional Microphone
Quantity: 6
Price: £954
Software
Product: DaVinci Resolve 11
Quantity: 25
Price: £15,625
Product: Final Cut Pro X
Quantity: 25
Price: £4,975
Product: Logic Pro X
Quantity: 25
Price: £3,499.75
Product: Motion 5
Quantity: 25
Price: £874.75
Product: Final Draft
Quantity: 25
Price: £3,681.75
Media Technology investment plan
We live in an ever expanding technological world, with new pieces or software and hardware being developed every day. The time to stay up to date on the latest equipment is now, with the gap between producer and consumer being broken, we are all 'prosumers'. Meaning that we are now capable to develop our own films, without needing a really expensive camera or budget. However as the college media department is constantly updating it's media technology, they need to stay up to date, so to ensure the students get the best possible quality of work from their software and hardware. I will be writing up a written rationale for the college, suggesting five new pieces of software and hardware which would be a great investment in this new technological era.
Hardware
Blackmagic Pocket Cinema Camera
The first piece of hardware which the college should invest in, is the Blackmagic Pocket Cinema Camera. This new top of the range DSLR camera, it is a pocket sized 16 digital camera which is shaping a new filmmaking generation. The Blackmagic Pocket camera records 1080HD resolution ProRes 422 (HQ), processing it at super speeds to SD cards. Making it easier and a lot quicker to colour correct your media files on your own personal computer. The Blackmagic is perfect for shooting a cinematic look, also being more perfect to film in more tougher and remote locations. The camera is also perfect for independent movies, documentaries, and more. The camera also has a wider dynamic range, this gives the footage a much more beautiful cinematic look. The wide dynamic range is 13 stops, meaning all footage retains sensor data. This camera comes in at a reasonable proposed price of £649, depending on the retailer you could get it cheaper.
In terms of replacements, this cutting edge DSLR camera would replace all the Canon 600Ds in the media department. It by far beats the quality of the Canon and it ha s a much better cinematic improvement in terms of shooting capabilities. It is also a lot more portable and easier to carry around, as opposed to the Canon 600D, although the Canon 600D is a brilliant camera, this Pocket Cinema Camera is also a lot better for transferring across files, as it is done a lot quicker and will convert into the right format.
You can purchase this Pocket Cinema Camera from this retailing website
http://www.jigsaw24.com/blackmagic-design-pocket-cinema-camera/cinema-cameras/-/fcp-product/19416
HERO3+ GoPro Camera
The second piece of hardware I would suggest to the media department that they should invest in, is the HERO3+ Black Edition GoPro Camera. This small extreme sports camera, is perfect for shooting fast paced extreme sports, such as mountain biking, skiing, bungee jumping, running etc. Being much smaller and lighter than its previous models, this new camera brings about highly improved image quality, with powerful new features such as being more convenient and versatile. This new model also has an added video mode called SuperView, this is a video mode which can capture a new cutting edge wide angle perspective. The HERO3+ also comes with a fully functioning Auto Low Light mode, this gives the footage an amazing low light performance, the way this works is that the function adjusts the frame rate. Other positives with the camera are that it has a 30% longer battery life, a 4x faster Wi-Fi, a much sharper lens and it is accessible on all GoPro mounts. The price for this camera is £359.99, this includes VAT and the import for any EU country.
Now this GoPro piece of hardware would replace the bigger cameras and the current GoPro's that are already in use in the college, which the media department have on offer, another camera which this new GoPro would replace would be the Canon XHA1S. This filmmaking camcorder is rather large and heavy. It records onto tapes and to transfer across footage, you have to use a dv tape deck. This is something which can take a long time. The Canon XHA1S is also what people usually use for harsher, more tougher terrain environments. Because it's bulky, it isn't so delicate. So the HERO3+ GoPro would be a perfect replacement as it designed for filming in tough locations and it built so that it can be knocker around a lot, without ascertaining heavy damage.
You can purchase the GoPro HERO3+ camera from this website
http://gopro.com/cameras/hd-hero3-black-edition
New iMac
Another piece of hardware the media department should invest in are the new model iMac's, which can be purchased directly from the Apple store. These will replace the thicker versions of the iMac desktops which are situated in the media department. These brand new iMac models are perfectly bold, with a big display. They use the fourth-generation Intel quad-core processors and the most up to date graphics. There is 75% less reflection on the screen, so it's a to easier to view your screen even with a low light intensity. One huge advantage with this new iMac is that it has an inbuilt technology called in-plane switching (IPS) , this is where you get a bright picture with excellent colour from every angle. This new model of iMac will replace the old ones, and they will be much more useful in terms of editing, as the process is a lot quicker and more information can be carried.
The new generation of iMac comes with a Fourth-generation Intel Core Processor, this makes the hardware the fastest possible it has ever been. The new NVIDIA graphics make it the fastest and most powerful its ever been. These graphics also gives you more frames per second in 3D games and editing HD videos with more responsiveness and speed is able to be done. The new version of the iMac also brings about better and newer versions of iPhoto, iMovie and GarageBand, Pages, Numbers and Keynote. Now with a student discount, there are various different prices these pieces of hardware come in. The 21 inch screen with a 2.9GHz costs £1,143.60, a 27 inch 3.2GHz iMac will cost £1,407.60. I would suggest that the media department invest in the 27 inch screen, as this will allow a lot more freedom with editing as all the post-production tools will be stretched out, giving you a much better focus on what you can improve.
The new model of iMac can be purchased via this address with the student discount
Magic Mouse
The Magic Mouse is the next piece of hardware that I would suggest to the media department to invest in, it is the worlds first Multi-Touch mouse. This is a smart and dynamic new product with in built Multi-Touch technology, this is a ground breaking new way to interact with portable devices. Now this accessory already comes with all the new generation of iMacs, so if the college invested in all the new iMacs then this mouse wouldn't be necessary. However if they don't invest in the new iMacs, this is still a good purchase they should consider, so to improve the desktops they already have.
This new mouse has a low profile design look, making is easier and lighter to use. It is a lot smoother in terms of scrolling on the Mac, there is no pausing or jolts. The right click is also a lot more sensitive and easier to use. Inside the Magic Mouse piece of hardware, there is also a chip which will tell the mouse exactly what action you wish to carry out. The benefit of this tool is that the mouse won't confuse either a click or a scroll, this is something the old Apple Mouse's (also the ones the college use) have a problem with and it can make using the Mac a lot harder. The motion control in the mouse also knows exactly when you are touching it. The Magic Mouse connects to the iMac via a Bluetooth connection, this is a great asset to have as it means there aren't any cables lying around, this will mean that for media students they can have more room for placing a bottle or water, along with all their notes and stationary utensils. Making it a much more accessible working environment. Obviously with purchasing these mouse's, there is the worry that they could get stolen. So my other suggestion would be that at the end of each college day, they are locked away in the lockers or they have a security tag on them, so that they can't be stolen. This Magic Mouse comes in at a very good price of £59.
The Magic Mouse cab ne purchased from here
Rode Pin Miniature Omnidirectional Microphone
The final piece of hardware I would suggest to the college media department to invest in would be the Rode Pin Miniature Omnidirectional Microphone. This new versatile clip on microphone, will be a great improvement to the ones already being used in the live television studio. This top of the range Rode Pin Microphone is easily hidden when worn, there is also greater mounting capabilities for use. The microphone has a cable back plate and a removable Omni-directional capsule head.
The reason I would suggest that the college purchase this new clip on microphone and get rid of the ones they already have is because it can also be used in lots of different locations, which can be harder to record sound in. For example the microphone comes with anti-trauma water resistant case, this allows for the microphone to have rugged and secure protection. There is also a miniature furry protection sock which will ensure you get best quality of sound recording in a rougher environment. Rode have also ensure with this clip on microphone that is can connect with all pieces of equipment in a studio environment. This piece of hardware comes kitted with MiCon, this is a connector system function which allows the mic to work with a wide range of wireless systems and consoles, cameras and portable recorders. Even though the current clip on microphone has a similar function, this new model has a much faster interface and the durability and battery life for the microphone also last longer. The proposed retail price for this microphone is £159, however depending on the retailer, you could get it a lot cheaper.
You can buy this product here at one of the retailers websites
Software
DaVinci Resolve 11
The first piece of software I would advise the media department in purchasing is DaVinci Resolve 11, this is a professional state of the art Hollywood editor and colour corrector software. This software is really accessible and resolution independent, meaning it can be used on the move on a set, or alternatively in a small studio or a large Hollywood production studio. It is a professional piece of software which is used globally on Hollywood feature films, television programs, music videos and viral advertisements. It is so popular due to its compatibility, speed and high image quality. All these qualities makes it much easier to manage your work flow.
The price for this software package comes in various different forms, the DaVinci Resolve 11 Lite version is completely free to download. This comes with all the different specifications, however you are limited with some of the tools. For example you are only limited to a certain amount of memory, when editing a project. You can also only edit up to 1080p HD, so my suggestion to the college media department would be to purchase the full software package at an okay price of £625. Now tis price allows you to edit 3D, as well as having an unlimited amount of editing space and allowing you to edit over 1080p HD. The DaVinci Resolve 11 editing software will be a good replacement in the college for After Effects. As this well outsmarts the colour grading and editing functions which After Effects can produce.
DaVinci Resolve 11 can be purchased as the full package or downloaded ad the free Lite version from this website
http://www.blackmagicdesign.com/uk/products/davinciresolve/howtobuy
Final Cut Pro X
The next piece of software I would suggest to the media department to invest in would be Final Cut Pro X, the college already has Final Cut Pro 7 installed onto all the Macintosh desktops. Now the higher education department has Final Cut Pro X installed on some of their Macs. However the further education department doesn't. So this new piece of software would be a good replacement for Final Cut Pro 7. This developed piece of software is a much bigger improvement to the prior piece of editing software, it has now been optimised for the newest Mac systems, there are dozens of editing enhancements, it is the cutting edge development for delivering 4K videos. The new Final Cut lets you smoothly edit at full resolution, added with an boosted playback feature. You can also edit multi cam with up to 16 continuous streams of 4K ProRes.
Both graphics cards are used in Final Cut Pro X, they can play back the effects as soon as you add them in. Hence meaning you can apply complex filters and colour grade all in real time. Another new benefit to this vast upgrade is that exporting is now done at a high speed. Final Cut Pro can accelerate the power of both GPUs to enhance the rendering and export in the background. The effect of this, in comparison to the old version which the college has is that you can now deliver files as fast as you edit. It also means you can still edit your clips while they are rendering, you can also export to YouTube in full 4K resolution. The price for Final Cut Pro X is £199, this is a fairly reasonable price, considering the huge difference it is to its successor.
Final Cut Pro X can be bought from this download link here
https://itunes.apple.com/gb/app/final-cut-pro/id424389933?mt=12
Logic Pro X
This enhanced piece of software is a great step up from Soundtrack Pro, its a recording studio designed for professionals which can be used on the Mac. Logic Pro also allows musicians globally to go from the first note, to final master. You can begin with any instrument you want, exploring lots of different loops and samples. This piece of kit comes with what is known as a 64-bit architecture, allowing you to handle projects of any size. This is a huge advancement to Soundtrack Pro, as it has some very beneficial qualities which Soundtrack Pro doesn't. For example it has an advanced set of options that lets you record, edit and manipulate performance.
One other advantage to Logic Pro X, which is why I am suggesting the media department purchase it is because of an editing feature called Flex Time. This function helps you to change the tempo and timing of your performance to achieve the smoothest performance possible. The waveform which contains individual beats can be easily moved, this allows you to change drum, vocal, guitar or any other form of track without slicing it up. Now this piece of software comes in a fair price of £139.99, this is a huge step up from Soundtrack Pro as it allows you so many functions, along with fast reciting and a much bigger library or authentic instrumental and orchestral sounds.
Logic Pro X can be bought at this address
https://ssl.apple.com/uk/logic-pro/
Motion 5
Another amazing piece of software which would be a huge asset to the media department and will replace Motion is Motion 5. This editing program is perfect for easily creating titles, transitions and effects for Final Cut Pro. The fact that this new updated version is also perfect for creating effects for Final Cut Pro is great for the media department as it means the two systems can work together. Making it especially easy and accessible to use for projects.
Motion 5 has a new easy layout interface which has been developed to make editing a lot easier for Final Cut users. This new interface comes complete with an enhanced retina display, redesigned icons and a darker look that will clearly highlight colour perception. A lot of the filters include onscreen controls for the effects, keyframe editing is also a lot more accessible because of a view that shows the keyframe editing tool under the timeline. The benefits of upgrading Motion to Motion 5 is because there is a much larger library effects, titles and transitions. These samples can also be further customised. Motion 5 also comes with the resolution independence function, this is where there is no size limit for still images or clips. Importing and exporting is also unlimited, wherein no matter what the size. You can import or export images without having to scale or crop them. All this comes in at a great price of £34.99.
This is the website address for purchasing Motion 5
https://itunes.apple.com/gb/app/motion/id434290957?mt=12&v0=www-naus-motion-buynow
Final Draft
The final piece of software I would the media department in college to invest is would be Final Draft, this is a leading screenwriting software package which is used by Hollywood industry professionals. It is also used on all the big Blockbuster films, it is the program that filmmakers most commonly use. This piece of software is also the leading number one selling for screenwriting software's. Final Draft would be replacing Celtx on the college Mac's, there are 100s of templates which the program already equips for the user, with a formatting tool which can be used for picking what kind of screenplay you are writing. For example, a film, television show, stage play etc.
Final Draft is a easy piece of software which has clear navigational tools so you know where everything is, there is a new navigator tool with the new version in which you can display script notes and character arcs. Filtered searches are also do able by key words. There is also a floating customizable palette which helps you to sort and sift through all your information, this is something which Celtx cannot offer. One of the great functions of Final Draft which Celtx doesn't have is Script Notes. This tool keeps a library of all your ideas, suggestions, parts of a scene that you cut out but don't want to delete it in case you need it for future use. Final Draft comes in at a price of £147.27
You can buy Final Draft here off of this website
http://store.finaldraft.com/final-draft-9.html
Estimated Quantity and cost for each year
Below I have written in lists the estimated amount of how many pieces of hardware and software the college will need, as well as how much it is going to cost them.
Hardware
Product: Black Magic Pocket Cinema Camera
Quantity: 6
Price: £3,894
Product: HERO3+ GoPro Camera
Quantity: 6
Price: £2,159.94
Product: iMac
Quantity: 25
Price: £35'000
Product: Magic Mouse
Quantity: 25
Price: £1,475
Product: Rode Pin Miniature Omnidirectional Microphone
Quantity: 6
Price: £954
Software
Product: DaVinci Resolve 11
Quantity: 25
Price: £15,625
Product: Final Cut Pro X
Quantity: 25
Price: £4,975
Product: Logic Pro X
Quantity: 25
Price: £3,499.75
Product: Motion 5
Quantity: 25
Price: £874.75
Product: Final Draft
Quantity: 25
Price: £3,681.75
Friday, 6 June 2014
TFOM - Characters wants and needs
For my single camera production, I made sure to create a characters want and need sheet. The reason for this is because it would help for me to understand the narrative better, as well as being able to make improvements to the story, according to my characters desires. With thanks to this list, I also create the character of Lucy, because I felt George needed a want and she was his want and this all helped to be the disruption to the narrative structure.
Characters
Name: Liam Westwood
Basic Information: Liam is a 17 year old male, he enjoys going out and socialising and is a very active sportsman. His bestfriend is George Lewis and they are like brothers, they share everything together and he regularly enjoys playing Xbox with him.
Want: Liam's want is to stop George from leaving the house and to stay safe in this new apocalypse.
Need: The main desire and need for Liam is to do the right thing and use his strength to get rid of anything risking his life. This includes killing "marked ones" and dealing with a growing infected George. Another need for Liam is that he needs his bestfriend George, Liam can't function without him, George is his rock. He's always there for him when he needs him.
Name: George Lewis
Basic Information: George Lewis is a 17 year old male also, George enjoys spending nearly all his free time with his girlfriend Lucy. They enjoy going out and chilling at parks. He also likes nature and chilling indoors. He is a regular gamer, joining forces with Liam on Xbox. His bestfriend is Liam, however he constantly neglects Liam and lets him down on many occasions because of Lucy. On the other hand though, at the best of times George has helped Liam, during some hard times.
Want: George wants to leave the reasonably safe environemnt of the house to go out and find his girlfriend, not being with Lucy and knowing where she is, makes him angry. He wants her for his own peace of mind.
Need: George needs to stay inside the house and rest up, he is growing ever so ill as the infection is hitting him and he is soon to turn into a "marked one". He also needs to appreciate his bestfriend Liam and realise that he has a point that he needs to stay safe inside because he's only going to die quicker.
TFOM - Storyboarding scenes
Below are various different storyboards for some of the main scenes in my single camera drama.
The first storyboard I have uploaded below is for the opening dream sequence with the character Lucy, this scene will follow directly after the opening titles. The reason I storyboarded this scene was because I really wanted to make this shot visually stunning and cinamtic, as I wanted a clear contrast between the apocalyptic world and back when everything was happy and calm. So by storyboarding this, it helped to understand different shots I was going to shoot.

The storyboard below is for the first diegetic scene after the dream sequence with Lucy and the establishing shots of the ghostly deserted town. This storyboard helped to understand how the shots I visualised in my head would turn out.

The scene which I have storyboarded a short segment of below is the flashback scene where Liam and George first encounter the army. This is visually going to be a very trick shoot as there quite a lot of angles which are needed and I am using five actors for this scene. This will be conisderbaly a bit harder to direct and having a storyboard will help me to piece it together easier.


The first storyboard I have uploaded below is for the opening dream sequence with the character Lucy, this scene will follow directly after the opening titles. The reason I storyboarded this scene was because I really wanted to make this shot visually stunning and cinamtic, as I wanted a clear contrast between the apocalyptic world and back when everything was happy and calm. So by storyboarding this, it helped to understand different shots I was going to shoot.
The storyboard below is for the first diegetic scene after the dream sequence with Lucy and the establishing shots of the ghostly deserted town. This storyboard helped to understand how the shots I visualised in my head would turn out.
The scene which I have storyboarded a short segment of below is the flashback scene where Liam and George first encounter the army. This is visually going to be a very trick shoot as there quite a lot of angles which are needed and I am using five actors for this scene. This will be conisderbaly a bit harder to direct and having a storyboard will help me to piece it together easier.
The storyboard below is for the pre-credits opening sequence where the character of Luke is running, being chased by someone.
TFOM - Celtx Script link
Below is a direct link to the pdf version of my script which I wrote up on Celtx.
https://docs.google.com/file/d/0BwiUeTRt51ykdmROclZZOU1pLUZMa09PQWl2M2pEcXQtQi1v/edit?usp=drive_web
https://docs.google.com/file/d/0BwiUeTRt51ykdmROclZZOU1pLUZMa09PQWl2M2pEcXQtQi1v/edit?usp=drive_web
TFOM - Evaluation for Single Camera Drama
WARNING, SPOILERS BELOW
During my first year of studying media production at college I have been tasked with many different projects and presentations, however my final major project for year one has definitely been the toughest but most enjoyable. We was given the task to create a ten minute single camera drama in groups of three to four or individually. I chose to work alone as I wanted to challenge myself and have full control of my production as I wanted to use an idea of my own and be able to direct and produce by myself. Overall I have really enjoyed putting the whole film together, I have faced challenges along the way, but it has been well worth it because it has helped me to learn more for becoming a professional director/filmmaker when I am older.
I will evaluate each stage of production, starting with the brainstorming of my concept ideas. So first things first, before I even started putting together my pre-production portfolio, I brainstormed on paper a load of different film ideas and then wrote them up on my blog. Before I brainstormed, I already had a clear idea of what kind of film I wanted to make, as well as an idea of the story and the characters I'd have in it. However I decided to brainstorm because I figured I shouldn't limit the amount of ideas I could think of, as I may suddenly come up with a better one. Even more so it could help to develop my principal idea. This exercise did help me because it helped me to develop my main idea, as small parts of my other film ideas helped to piece together my final piece.
The main idea was clear from the start, I wanted to do something of a darker tone. Set in a world where a deadly virus had broke out and human nature had fallen. The word 'fall' was always very important to me because it represented a society that was damaged and I wanted two best friend characters who previously before the outbreak got on like a house on fire, but have to suddenly deal with the infection and more importantly each others desires in this new dystopian earth. I always wanted to include flashback elements which would help to piece the narrative together, mixing the structure up a little bit. After I had my initial idea for a plot, thinking of the title came quickly to me. My title I thought of was 'The Fall of Man', the reason I loved this name was because it clearly represents the tone of the film, as well as giving an idea of what the story is about. The title clearly says in my head, the deconstruction of society and the uproar of the human race.
My idea was to have two boys who were best friends, as well as four army characters and another male friend. My story idea which I stuck with in the end, was set just after the aftermath of an infection that had reached breaking point and had killed off half the population, due to a rabid form of infected people who are ripping apart innocent humans. The film is then about how the two best friends have evacuated inside and how they deal with the oncoming events. The infected who are still loose out in the world are known as 'Marked ones' or 'rabid' and one of them who initially I wanted as the other main male character in the story is seen unconscious out on the grass, in the house that the two main male leads are hiding in. I decided to call the two main male characters Liam and George and the Marked one in the garden Luke. The reason I changed the third main male character to being a dead Marked one was because I felt it would be more dramatic and it adds to the disruption part of the Todorov narrative theory, something he claims is applied to all films and it makes them more appealing to audiences because it has a more understandable climax. I also wanted to include various flashback elements to my film as it helps to give some backstory to the characters lives, right up to when the apocalypse began.
After writing the story idea, I then took inspiration from some of my brainstorm ideas and decided that the pre titles sequence would be about Luke and it would involve some dialogue scenes, which would then result in his death. After deciding to write a scene for Luke, I felt more depth was needed to his character to make the audience feel closer to him and to make it more plausibly needed for the film. My decision was that he had been infected and that he was being chased by a human, on the hunt to kill all Marked ones. This idea that he was trying to fight an infection came from one of my other film ideas, my other brainstormed idea was about a boy who was seriously ill and he was trying to fight his illness so that he could see his sister for one last time. I also decided that the pre-titles sequences would show look pleading for his life, sift a medium shot of a gun pointing to his head. I didn't want to show who was at the helm of the gun, this was because I wanted to create enigma codes and make the audience ponder who it could be. One of the later flashback elements of the narrative would be an extended version of this scene, showing the person who was pointing the weapon.
Being happy and confident with my film idea, I was then raring to get started on my single camera drama. I started work on all the pre-production paperwork, making sure to have a clearly written up outline of my story, as well as a log line and synopsis so that my narrative was easy to understand and clearly represented the themes it covered. During the pre-production stages, I went to various different fields to do location reports and assess the environment around so that I had a good idea of what the visuals would look like, as well as being aware of what sound I would pick up. Knowing that I wanted to use a couple of different fields for my single camera production, I managed to find two which were perfect for what I wanted. After the title sequence, I wanted a dream sequence with George's girlfriend Lucy, playing and running around in a field. This is an uplifting no dialogue scene, which shows the contrast in before the disaster, everything is happy and bright. So I wanted a bright field, luckily I found a yellow rapeseed field which was perfect for that very scene. My initial idea for my single camera drama did not include any female characters, however after noting down a beat sheet and a sheet for my characters wants and needs I realised that I needed to create some tension amongst George and Liam. So I decided that George's want was that he wants to find his missing girlfriend in this new post-apocalyptic universe. This causes tension amongst the two of them because Liam just wants to stay inside and stop George from leaving to find Lucy. I hoped that by adding an extra female character, it would make my film more interesting and engaging to watch.
In conclusion to doing all my pre-production work, I felt it went rather smoothly and had all been completed within a couple of weeks, well in advance to filming. One of the only issues which did arise in terms of pre-production was that I had to do quite a lot of re-writes of the scripts. All in all I did about five different drafts of my scripts, the day before I was scheduled to film the army flashback scene, one of my soldier characters called Redman M pulled out due to other commitments, so I had to get rid of all his lines and sift them amongst the three other soldier characters. This caused a lot of hassle as Redman M's lines really involved a fourth soldier, so I had to rewrite his lines to suit the conversation. I decided to still go ahead with the scheduled shoot because I wanted to give myself a lot of time with this scene as it was a tricky shoot and if anything didn't go as planned, I'd have had time to reshoot.
Now onto the production filming side of my single camera production, all in all I did six separate days of shooting. These were all for different scenes and reshoots of certain shots. I started filming on the 15th of April and I finished filming on the 27th May, the last two shooting days I scheduled in, were for if I needed to re film anything. And this was useful because on both of my scheduled reshoot days, I decided to re film some shots from the army flashback scene, pre-titles sequence and cutaways of Luke's hands and body. The reason I did this was because some of my army flashback scenes looked way too overly exposed, as well as this I also needed to add some extra dialogue because I needed to make up a bit more time. The cutaways I re shot of the character Luke, were also necessary because they break up the dialogue and the cutaways I previously shot were also too overly exposed. To avoid the problems with over exposing in the future, I will make sure to turn down the contrast and saturation on the camera, as well as using boards which can help to block out the sunlight. Below is a comparison of the overly exposed shots and the newly filmed shots which I redone.


Colour grading and correction was another important element to me in the post-production stage, this is because for my film I wanted a darker more murkier feel to it. I wanted a desaturated, low contrasting feel to it. The reason I wanted this look was because for the new fallen word, everything was dying and I wanted colour to help portray this. To achieve this look as seen below, I went onto video filters, image control and the desaturate setting. This look was perfect for what I needed. All I had to do then was apply this desaturated look to the clips. One of the only issues when applying image control effects was that at times, the natural light shot on the day was dark, so by using a desaturated look it takes down the quality and it can make it darker. So I had to be very fiddly and make sure not to make my clips look worse.

Another colour grading effect I played with on some of my clips was the colour corrector 3-way, gamma, brightness and contrast and again desaturate. I used these effects on the dream scenes with Lucy and George (as seen below). I wanted to make the dream scenes really bright and I wanted to bring out the colours on certain parts of the location, so for the clip below I really wanted to bring out the green in the grass and the blues on their clothing. I wanted the dream scene to be all bright and happy, because I wanted to show a clear contrast between the apocalyptic world and the past. Showing how happy the characters used to be and how they are now. I had to add these effects in anyway, because a lotos my dream scenes were too overly exposed. In terms of problems with adding these effects, it did take me a lot of time to get the colours how I wanted. Initially I just started changing the levels on the colour corrector 3-way, using the blues and the yellowy green colours to bring up their intensity. However this still didn't look right, so I added some gamma effects to bring up the background colours, as well as using desaturate to give their faces a glowing feel and brightness and contrast to make it look more summery.


Once I had finished adding in all the colour correction I felt I was done, however I faced a few more problems with the edit. This was because after watching it through and getting an opinion from a couple of classmates, I was made aware that some of the sound starts to get muffled because it was too loud. I hadn't taken this into account at first as I just assumed the sound was fine because it was clear and you could hear it. This was true, however I soon realised that a lot of my scenes had major amounts of clipping in them.
This is when the sound levels are too high and they reach the red scale of the sound levels, this means that because the sound is so loud, it starts to get muffled and it isn't professionally correct. Cinemas also won't accept films if they have clipping in them, the way I knew there was clipping is because I watched through the whole film again and any times the sound levels reached the top and the lights turned red, I knew I had to fix this. This caused a lot of hassle because it meant for the majority of the film I had to turn the sound down so that it wasn't clipped. Doing this also meant I had to make sure the sound was then consistent throughout, after turning all the sound levels throughout and using key frames to make it stay consistent, sound was then as I wanted it. Below are some screenshots of the process I went through.


After correcting all the sound and fixing all the colour correction I was happy with my edit, my main plan which I visualised was to get a darker cinematic feel to it. I focused a lot on my establishing shots during production, because I wanted to try and put across in my film an eerie ghostly feel to the world. And I knew if I could achieve these shots, I could use colour correction and non-diegetic music to help further the narrative. For my final scene in the house, I wanted to also use a load of quick cuts of the character Liam panicking as he sees George dying. The way I went about this was I used the razor tool to cut a load of clips together quickly, I also used dark ambient music to make this scene more intense. These shots then cuts to the jump scare of a rabid Luke banging his hand on the glass. The reason I added in this jump scare clip straight after the fast cuts was because I felt it kept the narrative engaging and adds as a nice final cliffhanger before the credits and post credits sequence.


During my first year of studying media production at college I have been tasked with many different projects and presentations, however my final major project for year one has definitely been the toughest but most enjoyable. We was given the task to create a ten minute single camera drama in groups of three to four or individually. I chose to work alone as I wanted to challenge myself and have full control of my production as I wanted to use an idea of my own and be able to direct and produce by myself. Overall I have really enjoyed putting the whole film together, I have faced challenges along the way, but it has been well worth it because it has helped me to learn more for becoming a professional director/filmmaker when I am older.
I will evaluate each stage of production, starting with the brainstorming of my concept ideas. So first things first, before I even started putting together my pre-production portfolio, I brainstormed on paper a load of different film ideas and then wrote them up on my blog. Before I brainstormed, I already had a clear idea of what kind of film I wanted to make, as well as an idea of the story and the characters I'd have in it. However I decided to brainstorm because I figured I shouldn't limit the amount of ideas I could think of, as I may suddenly come up with a better one. Even more so it could help to develop my principal idea. This exercise did help me because it helped me to develop my main idea, as small parts of my other film ideas helped to piece together my final piece.
The main idea was clear from the start, I wanted to do something of a darker tone. Set in a world where a deadly virus had broke out and human nature had fallen. The word 'fall' was always very important to me because it represented a society that was damaged and I wanted two best friend characters who previously before the outbreak got on like a house on fire, but have to suddenly deal with the infection and more importantly each others desires in this new dystopian earth. I always wanted to include flashback elements which would help to piece the narrative together, mixing the structure up a little bit. After I had my initial idea for a plot, thinking of the title came quickly to me. My title I thought of was 'The Fall of Man', the reason I loved this name was because it clearly represents the tone of the film, as well as giving an idea of what the story is about. The title clearly says in my head, the deconstruction of society and the uproar of the human race.
My idea was to have two boys who were best friends, as well as four army characters and another male friend. My story idea which I stuck with in the end, was set just after the aftermath of an infection that had reached breaking point and had killed off half the population, due to a rabid form of infected people who are ripping apart innocent humans. The film is then about how the two best friends have evacuated inside and how they deal with the oncoming events. The infected who are still loose out in the world are known as 'Marked ones' or 'rabid' and one of them who initially I wanted as the other main male character in the story is seen unconscious out on the grass, in the house that the two main male leads are hiding in. I decided to call the two main male characters Liam and George and the Marked one in the garden Luke. The reason I changed the third main male character to being a dead Marked one was because I felt it would be more dramatic and it adds to the disruption part of the Todorov narrative theory, something he claims is applied to all films and it makes them more appealing to audiences because it has a more understandable climax. I also wanted to include various flashback elements to my film as it helps to give some backstory to the characters lives, right up to when the apocalypse began.
After writing the story idea, I then took inspiration from some of my brainstorm ideas and decided that the pre titles sequence would be about Luke and it would involve some dialogue scenes, which would then result in his death. After deciding to write a scene for Luke, I felt more depth was needed to his character to make the audience feel closer to him and to make it more plausibly needed for the film. My decision was that he had been infected and that he was being chased by a human, on the hunt to kill all Marked ones. This idea that he was trying to fight an infection came from one of my other film ideas, my other brainstormed idea was about a boy who was seriously ill and he was trying to fight his illness so that he could see his sister for one last time. I also decided that the pre-titles sequences would show look pleading for his life, sift a medium shot of a gun pointing to his head. I didn't want to show who was at the helm of the gun, this was because I wanted to create enigma codes and make the audience ponder who it could be. One of the later flashback elements of the narrative would be an extended version of this scene, showing the person who was pointing the weapon.
Being happy and confident with my film idea, I was then raring to get started on my single camera drama. I started work on all the pre-production paperwork, making sure to have a clearly written up outline of my story, as well as a log line and synopsis so that my narrative was easy to understand and clearly represented the themes it covered. During the pre-production stages, I went to various different fields to do location reports and assess the environment around so that I had a good idea of what the visuals would look like, as well as being aware of what sound I would pick up. Knowing that I wanted to use a couple of different fields for my single camera production, I managed to find two which were perfect for what I wanted. After the title sequence, I wanted a dream sequence with George's girlfriend Lucy, playing and running around in a field. This is an uplifting no dialogue scene, which shows the contrast in before the disaster, everything is happy and bright. So I wanted a bright field, luckily I found a yellow rapeseed field which was perfect for that very scene. My initial idea for my single camera drama did not include any female characters, however after noting down a beat sheet and a sheet for my characters wants and needs I realised that I needed to create some tension amongst George and Liam. So I decided that George's want was that he wants to find his missing girlfriend in this new post-apocalyptic universe. This causes tension amongst the two of them because Liam just wants to stay inside and stop George from leaving to find Lucy. I hoped that by adding an extra female character, it would make my film more interesting and engaging to watch.
In conclusion to doing all my pre-production work, I felt it went rather smoothly and had all been completed within a couple of weeks, well in advance to filming. One of the only issues which did arise in terms of pre-production was that I had to do quite a lot of re-writes of the scripts. All in all I did about five different drafts of my scripts, the day before I was scheduled to film the army flashback scene, one of my soldier characters called Redman M pulled out due to other commitments, so I had to get rid of all his lines and sift them amongst the three other soldier characters. This caused a lot of hassle as Redman M's lines really involved a fourth soldier, so I had to rewrite his lines to suit the conversation. I decided to still go ahead with the scheduled shoot because I wanted to give myself a lot of time with this scene as it was a tricky shoot and if anything didn't go as planned, I'd have had time to reshoot.
Now onto the production filming side of my single camera production, all in all I did six separate days of shooting. These were all for different scenes and reshoots of certain shots. I started filming on the 15th of April and I finished filming on the 27th May, the last two shooting days I scheduled in, were for if I needed to re film anything. And this was useful because on both of my scheduled reshoot days, I decided to re film some shots from the army flashback scene, pre-titles sequence and cutaways of Luke's hands and body. The reason I did this was because some of my army flashback scenes looked way too overly exposed, as well as this I also needed to add some extra dialogue because I needed to make up a bit more time. The cutaways I re shot of the character Luke, were also necessary because they break up the dialogue and the cutaways I previously shot were also too overly exposed. To avoid the problems with over exposing in the future, I will make sure to turn down the contrast and saturation on the camera, as well as using boards which can help to block out the sunlight. Below is a comparison of the overly exposed shots and the newly filmed shots which I redone.
Filming the pre-titles chase sequence at the very beginning of the film with my actor Jack was a challenge. This was because I was looking to make this sequence as fast paced as possible, I wanted to use fast cuts to make it more engaging. This proved quite successful in the end, however I had to film a lot of different angles just to achieve this. It was hard because my actor grew tiresome from all the running, and the lighting at many times made the shot really white or really dark. So keeping it consistent was hard. My other vision was that I wanted to involve the use of various cutaways of cars zooming past, just to make the scene seem more hectic and more action packed. However this would be hard to achieve without breaking laws or violating peoples identities by showing their number plates.
Lighting is an element in itself which is worth discussing in terms of my evaluation on production, when filming all of my scenes I had very little artificial lighting, mostly all the lighting used was natural lighting on location. For all the main scenes in the house, most of the lighting was natural. Overall for the scenes in the house, I wanted a desaturated murky feel to it, I planned to colour correct it like this in post-production. However I also had to play with a few different colour grading settings on my camera to achieve this, for example I had to change the aperture and change the settings for saturation and contrast. Because I did this it meant the lighting was slightly toned down and at times my actors faces were dark, although I didn't want to change the colour settings on my camera because it would just look plain and not how I wanted it. So I used the ceilings lights in house to light up the scenes, this helped to illuminate my actors faces, while still keeping a slightly murky/desaturated feel to it. I decided that I could tweak the colours so they were better in post-production.
As previously discussed, filming the army flashback scene was probably the most challenging filming slot. This was because the actors for my film weren't professional actors, they were just my friends and with that comes a lot of hardship for them to act in a professional way. It took a lot of takes for each line because a lot of the time they wouldn't be able to portray the emotion or they'd laugh a little. I expected this to happen anyway, but overall they got the performance right in the end and we had fun producing it. Other issues which were a problem when filming was obviously natural lighting, this caused masses of problems as some of my really important dialogue lines weren't usable as the footage was too bright, I decided I didn't want to even attempt to try and colour grade and fix this in post-production as it would bring down the quality down and the mood I was trying to achieve did not need high amounts of colour correction, sos I felt it wouldn't good. My preferred solution to this was to just reshoot it, and this is exactly what I did, below you can see a couple of screenshots of the overly exposed shots on the army flashback initial shoot and a shot of my actors all laughing during an intense scene.
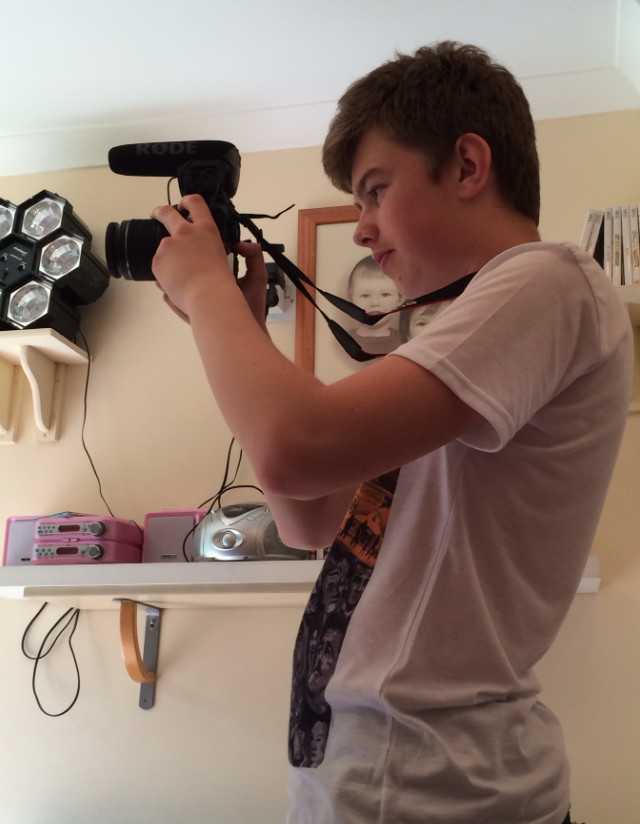
Now in terms of sound planning and production on my single camera drama, I did a lot of research and planning as well as using the best equipment possible to bring out great diegetic sound. First of all during pre-production, I analysed various different scenes in movies, looking at how sound makes the narrative more engaging and dramatic. After this I then visualised in my head how I wanted it to sound, I generally wanted my film to have a dark ambient theme throughout, I wanted this to be a non-diegetic sound which represent the apocalypse that is unfolding. Amongst this the diegetic sound was also important for me, so to achieve clear dialogue I wanted to do my proper research in microphones and then purchase the best one possible in my budget. After doing a lot of research on different models such as Rode, Samsung and Zoom I decided to go with the Rode Video Mic Pro, this is a clip on shotgun microphone with four different settings for achieving different levels of sound in different environments.
My reasoning for purchasing this mic was because of it's popular reviews and because it has a strong directional range. Meaning whatever the mic is pointing at, it will pick that sound up from a large distance. When I filmed dialogue scenes in the house, I used the 0db setting on the mic, this setting best picks up diegetic sound for quiet environments so I new this would be perfect. For the rest of the film, I recorded the outside diegetic dialogue scenes using the -10db and high pass filter setting. The reason for this is because I did not want to get the sound of the wind or rustling and the high pass filter can cut this out. The -10db setting is also useful in recording dialogue in outside locations. In conclusion to recording sound for my film, there are still some issues which I need to address. When filming outside, a couple of times I forgot to switch the -10db and high pass filter setting on, this was a problem because some of the dialogue is muffled and you can hear the wind. However in post-production I tried my best to get rid of this, I know for the future to constantly make sure to check the right setting is being used. One of the other issues with my sound recording was that when filming in the house, some of the lines of dialogue are meant to be shouted and they were shouted by my actors, however the microphone at close range really picks up loud diegetic sound. And listening to it back, it is almost deafeningly loud, so loud that is starts to get muffled. However I managed to fix this in post-production. I will briefly talk about that later.
Post-production was a lengthy but enjoyable process for me, I started editing on the 25th of April and finished on the 4th of June. My aim in terms of my whole single camera production was that I wanted to spend a lot more time on post-production as opposed to the production filming side, this was because for my film I wanted a very specific dark and eerie tone and to portray this I would need to do a lot of colour grading, effects and use of different soundtrack. So by giving myself a large window to edit in, I had the best chance of getting the right look, without over doing it. I also felt that with editing, if my footage all turned out really poorly, I would still have a better chance of improving it, as with editing anything shoddy can be made to look good.
My first plan was to just put together a whole ten minute rough cut of my film, without any effects, colour grading or soundtrack which had been edited in. The first reason I chose to do this was because first of all it was just more practical, the reason for that is because every time you add any effects, transitions, sound components etc, Final Cut has to render the clip for you to be able to play it back and watch it. And this can take up to 50 minutes to render, so by just doing a rough cut, this gave me the opportunity to put the whole film together without having to wait for a render. Doing a rough cut also meant I could do some "spotting", this is where you watch your whole sequence through and then mark out in every possible part, where you need to add colour grading effects, transitions, sound and anything else. The reason the process of "spotting" is necessary is because it gives you a perfect idea of where certain effects and sound/transitional elements will help to make the film stronger and more engaging. Often you can't tell if a piece of music or colour will work, so watching the whole thing through as a rough cut will help you to understand whereabouts the film is lacking and this is where you can position your effects. Marking out points for each part of non-diegetic, ADR, foley or other sound effects also makes it easier to sync up the added sound with the live recorded diegetic sound. Below is a link to my uploaded rough cut, as well as some images of the "spotting" process during the rough cut edit.
I placed a marker point during the last scene in the house, for when Liam picks up the gun. I placed a marker at the very moment he touches/picks up the weapon. The reason I placed a marker here is because it gives me a guide as to where I can add in a foley sound effect for a gun being picked up. The effect of an added foley effect is that it makes the film more realistic. As well as this, we as an audience are so used to hearing loads of amplified small sound effects in film, and if we don't hear anything, our ears can't adjust to it and it doesn't sound or look right.
Below are a couple of other various screenshots of markers I placed during the "spotting" stage, which helped me to add in the right effects where needed. For example the first screenshot below is a marker I added in for when the character Luke hits his hand on the glass window, for the exact second his hand touches the window, I have added in a non-diegetic jump scare sound effect. The reason I added it in when his hand hits the glass is because I felt it synced together nicer and would make for a more darker/jumpy twist. The other screenshots are examples of me marking out other parts for "spotting".
Colour grading and correction was another important element to me in the post-production stage, this is because for my film I wanted a darker more murkier feel to it. I wanted a desaturated, low contrasting feel to it. The reason I wanted this look was because for the new fallen word, everything was dying and I wanted colour to help portray this. To achieve this look as seen below, I went onto video filters, image control and the desaturate setting. This look was perfect for what I needed. All I had to do then was apply this desaturated look to the clips. One of the only issues when applying image control effects was that at times, the natural light shot on the day was dark, so by using a desaturated look it takes down the quality and it can make it darker. So I had to be very fiddly and make sure not to make my clips look worse.
Another colour grading effect I played with on some of my clips was the colour corrector 3-way, gamma, brightness and contrast and again desaturate. I used these effects on the dream scenes with Lucy and George (as seen below). I wanted to make the dream scenes really bright and I wanted to bring out the colours on certain parts of the location, so for the clip below I really wanted to bring out the green in the grass and the blues on their clothing. I wanted the dream scene to be all bright and happy, because I wanted to show a clear contrast between the apocalyptic world and the past. Showing how happy the characters used to be and how they are now. I had to add these effects in anyway, because a lotos my dream scenes were too overly exposed. In terms of problems with adding these effects, it did take me a lot of time to get the colours how I wanted. Initially I just started changing the levels on the colour corrector 3-way, using the blues and the yellowy green colours to bring up their intensity. However this still didn't look right, so I added some gamma effects to bring up the background colours, as well as using desaturate to give their faces a glowing feel and brightness and contrast to make it look more summery.
BEFORE
AFTER
This is when the sound levels are too high and they reach the red scale of the sound levels, this means that because the sound is so loud, it starts to get muffled and it isn't professionally correct. Cinemas also won't accept films if they have clipping in them, the way I knew there was clipping is because I watched through the whole film again and any times the sound levels reached the top and the lights turned red, I knew I had to fix this. This caused a lot of hassle because it meant for the majority of the film I had to turn the sound down so that it wasn't clipped. Doing this also meant I had to make sure the sound was then consistent throughout, after turning all the sound levels throughout and using key frames to make it stay consistent, sound was then as I wanted it. Below are some screenshots of the process I went through.
After correcting all the sound and fixing all the colour correction I was happy with my edit, my main plan which I visualised was to get a darker cinematic feel to it. I focused a lot on my establishing shots during production, because I wanted to try and put across in my film an eerie ghostly feel to the world. And I knew if I could achieve these shots, I could use colour correction and non-diegetic music to help further the narrative. For my final scene in the house, I wanted to also use a load of quick cuts of the character Liam panicking as he sees George dying. The way I went about this was I used the razor tool to cut a load of clips together quickly, I also used dark ambient music to make this scene more intense. These shots then cuts to the jump scare of a rabid Luke banging his hand on the glass. The reason I added in this jump scare clip straight after the fast cuts was because I felt it kept the narrative engaging and adds as a nice final cliffhanger before the credits and post credits sequence.
In conclusion to my evaluation I am really happy with how my final major project has turned out. I have faced many challenges along the way, but it has been a big learning process which will help me to develop even better films in the future. In terms of problems I have faced and things which have gone wrong during the whole process, there are some things which need to be addressed.
Firstly I should have done a lot more takes for all my scenes, because for each line of dialogue I only did a few takes. And this caused a lot of hardship during editing, the reason for this is because it was harder for me to find a really great shot, because some of the shots weren't visually what I wanted and if I had made sure to film it four or five times even if it looked good, I would have had more choice of what clips to use. Also some of the scenes I shot didn't look right, either they were overly exposed or there are things which distract you from the main dialogue. Say for instance, a piece of clothing in the garden or a random person in the distance. However I know for my next project to do a lot more takes, to fix these problems, I did do a couple of reshoots.
Another problem which occurred during my production was some muffled dialogue, especially for the flashback army scene. Some of the dialogue is really muffled because the day we filmed on, there was lot of wind. And I forgot for some diegetic scenes to turn the high pass filter on. So for some dialogue, the sound is really clear, but others the sound is really loud and the ambience is amplified, or the dialogue is really quiet, but the wind is really loud. So to fix this I reshot some of the dialogue and added in a audio filter on post-production to try and fix this. In the future I will make sure to constantly check the microphone, so that all the diegetic sound is recorded with the right settings. I will also make sure to purchase a wind shield for my microphone, so to try and cut our more muffling.
Lighting was also a problem in some scenes, however I have already discussed this. I know for my next project, to alter the white balance and contrast settings on my camera, as well as using items to try and block out the heavy sun light. Some of my sound isn't consistent or perfect as well in my film, the reason for this is because I recorded dialogue in different environments and with different settings. A lot of my sound also had clipping so I had to adjust the settings. To avoid this in the future I will make sure to place the microphone from a further distance for scenes where the dialogue is shouted, as well as using more key frames to keep the sound editing consistent.
Overall in conclusion to my single camera drama, I have really enjoyed producing the film. It has all been a challenge but it is exactly what I joined the course for. I definitely know for my next project that I will be able to make improvements in all different areas. Making sure to film a lot more different angles and film dialogue scenes a lot more times. I also want to use professional actors for my next project as they will be more used to the work and it is something they can engage in a lot better. If I had to change anything, I would say I could improve a lot of the shot reverse shots. After realising in post-production that I didn't follow the 180 degree rule, which I should have. However on the day of filming I focused too much on other aspects and when I came to relaise I didn't follow the rule, it was too late to reshoot. Having highlighted all my faults in this production, I am very proud of what I have produced, but have learnt a lot which can help me to make a better film next time.
Thursday, 5 June 2014
TFOM - Single Camera Drama - Finished film
With all my pre-production portfolio work completed for my single camera drama, my finished film has now been uploaded onto YouTube and can be viewed in the thumbnail below. To make your lives a bit easier marking all my final major project work, I have put the abbreviation 'TFOM' standing for The Fall of Man in the titles for all my pieces of single camera drama work. I have also tagged all my FMP work as 'Single Camera Drama FMP'.
Make sure to keep watching until after the credits!;)
Title: The Fall of Man
Genre: Post-apocalyptic thriller
Logline: On the verge of world decimation, best friends Liam and George must learn to live in a fallen society. Using their wits and strength to survive a deadly virus in a new dystopian post-apocalyptic world.
Tagline: It's time to take up arms, the Fall of Man is now.
Monday, 2 June 2014
TFOM - Pre-production and Production shooting schedule
Before any form of production took place on my final major project, I made sure to first make a schedule for completing pre-production and a schedule in terms of production shooting. This was so to make sure I could maintain time and not lose track of the days, making sure to complete my film within the deadline. Even giving myself a couple of extra days before hand in, just to give myself the opportunity to make changes in case something was wrong. Below are the two links to my schedules which I created on my Google Drive.
Pre-production Schedule
https://docs.google.com/spreadsheets/d/1jr7tD1pFubDYfqomYR-r9V-4klP_xA_E5oWpaqIu6NY/edit
Production Shooting schedule
https://docs.google.com/spreadsheets/d/1p-gbw00nLVEwzAqNQ7yJpuo6FCLXqY6sjdMWUKLy6hw/edit#gid=0
Pre-production Schedule
https://docs.google.com/spreadsheets/d/1jr7tD1pFubDYfqomYR-r9V-4klP_xA_E5oWpaqIu6NY/edit
Production Shooting schedule
https://docs.google.com/spreadsheets/d/1p-gbw00nLVEwzAqNQ7yJpuo6FCLXqY6sjdMWUKLy6hw/edit#gid=0
Subscribe to:
Comments (Atom)